Saturday, December 19, 2009

Finished Viking!

Here's a pic of the finished Viking apron and the "smurf hat" I made for Calafian winter Arts!
Click to enlarge Not too bad for my first time at the viking rodeo I like to think.:) It was extremely comfortable and really warm. GOOD Estrella garb! I believe I will have to give this another whirl soon. And just cause I'm a show off, here's my sparse table from winter arts featuring my orange Italian Ren and my hubby's cassock coat.

Hope everyone has a wonderful Holiday!

Saturday, November 28, 2009

Been too Long...so I made more garb.

Wow, Its been FAR too long since I updated. My excuse is the hubby and I have been busy moving into a house for the last..oh...3 months it seems. We bought a nice fixer upper so a good chunk of my sewing time was taken up with painting and installing floors. But now things have finally settled and I managed to get myself back on the sewing train! The best part is now I have a studio space to work in instead of sewing in the bedroom!


So I've been wanting to work on a viking apron for a long time now. I was a bit reluctant at first mostly because I'm a big busted gal and I was afraid the whole thing would make me look pregnant. Then I realized that most women I know who wear this style ARE big busted gals and I was being stupid.
My LJ friend [info]sabre0link sent me some excellent links on viking garb for both men and women (if you're interested in seeing them, let me know! I'll post them up here!). They were a HUGE help and I found any different ways to put an apron together.


Click to Enlarge these pics.

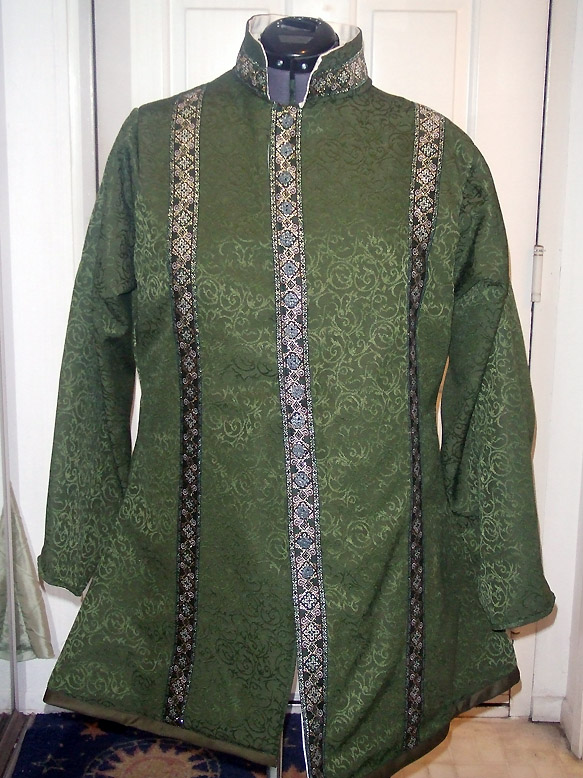
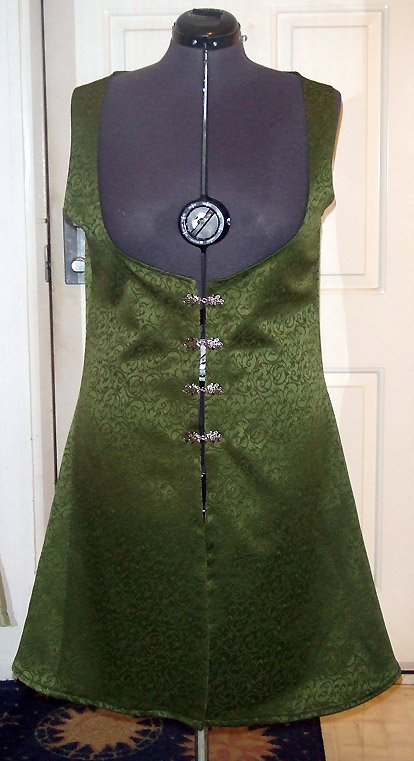
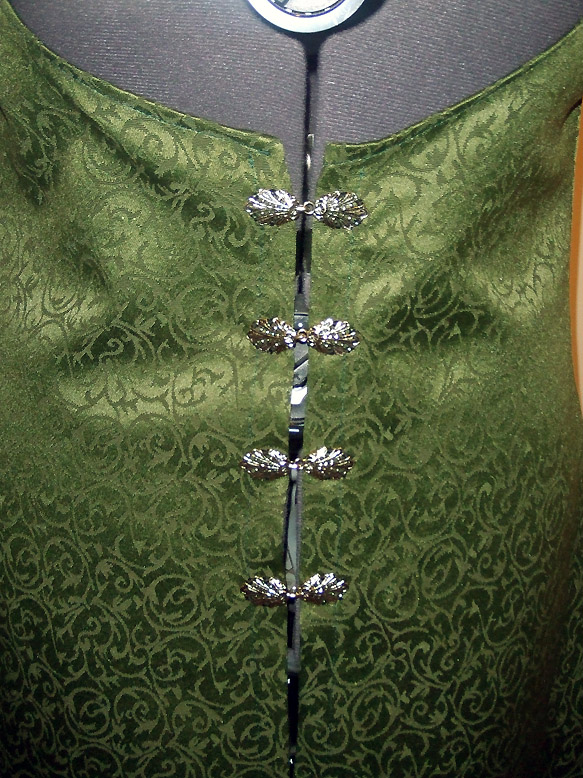
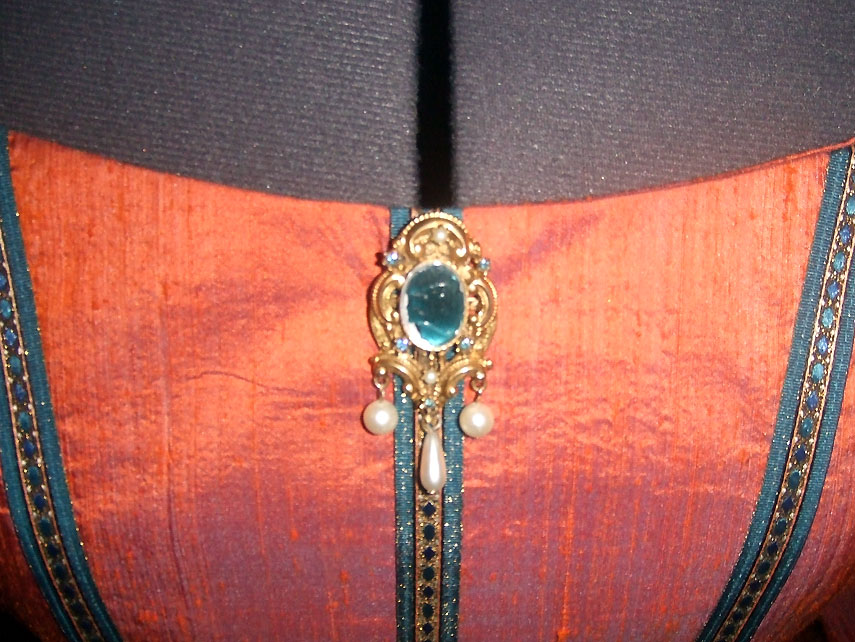
In the end, I went with the very simple two rectangles and two gores on the side look. Above is the finished product. I originally had the gores too high, where my bust line ended, and the apron looked really sloppy, not to mention it looked more like a MuMu than anything else. So I hacked it apart and lowered the gores. I think the result is much nicer. The wool came from a thrift store buy years and years ago. The brooches I bought...what can I say, I love the shiny. The festoons I made myself from some lamp beads and other finds I had in my stash. I think I'll have to strengthen my knots on the festoons though. I don't really trust my knot tying skills...hence why I married an ex sailor.
Overall, I'm really happy with it. I will be wearing my orange kirtle I bought a few wars back under the apron. Its not not pictured since I was being ADD and working on two garments at once on my dress form.

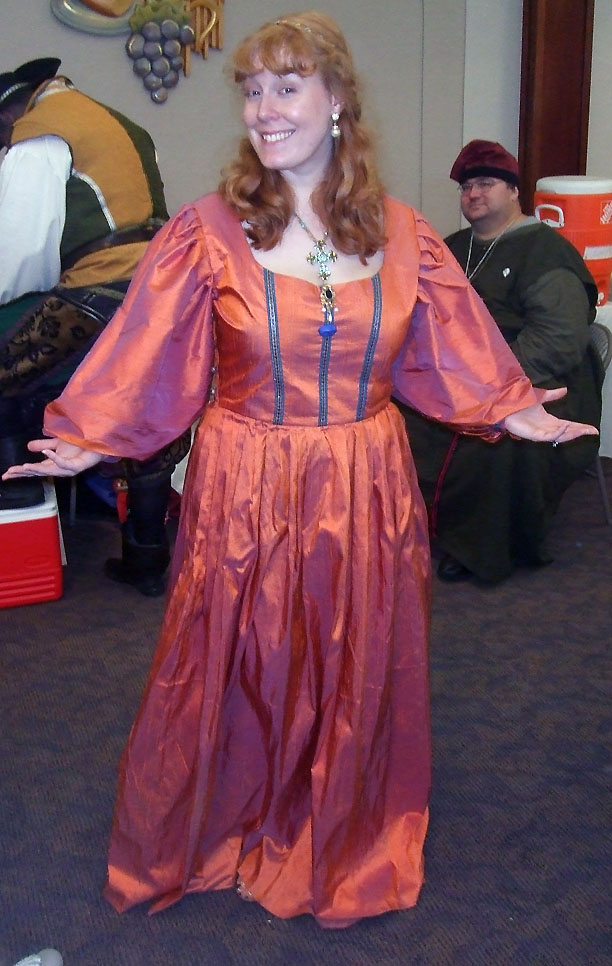
And yes, I am working on yet ANOTHER italian Ren!

Click to Enlarge.

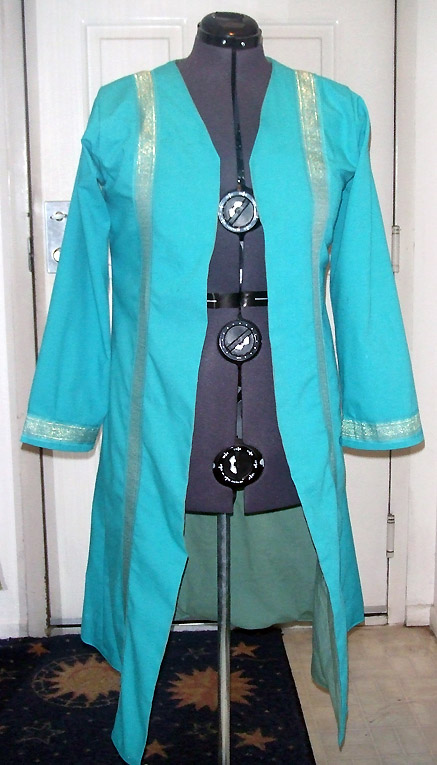
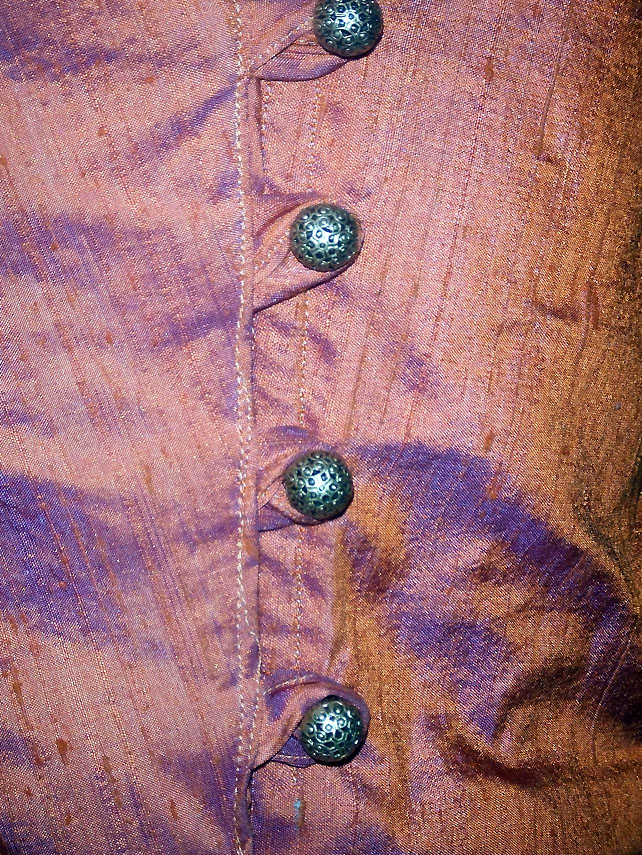
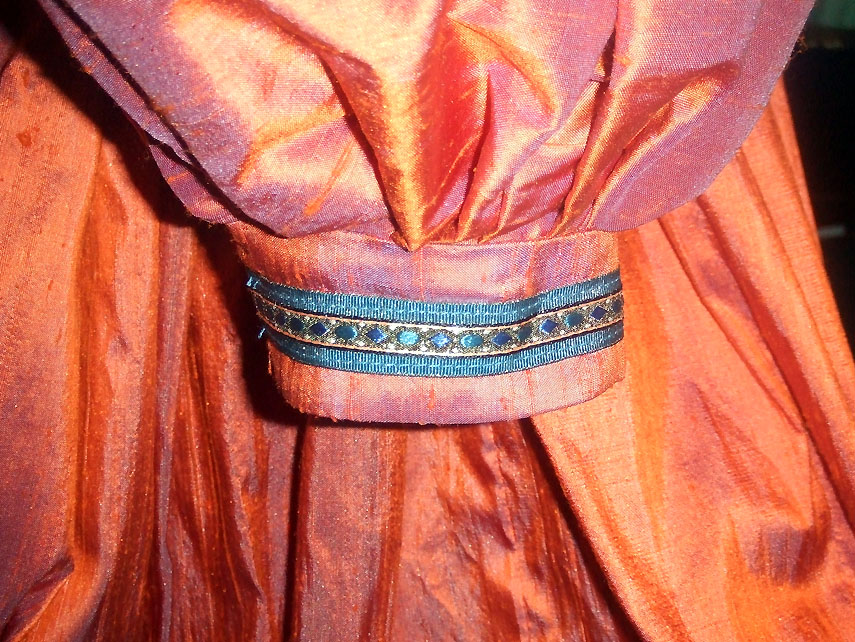
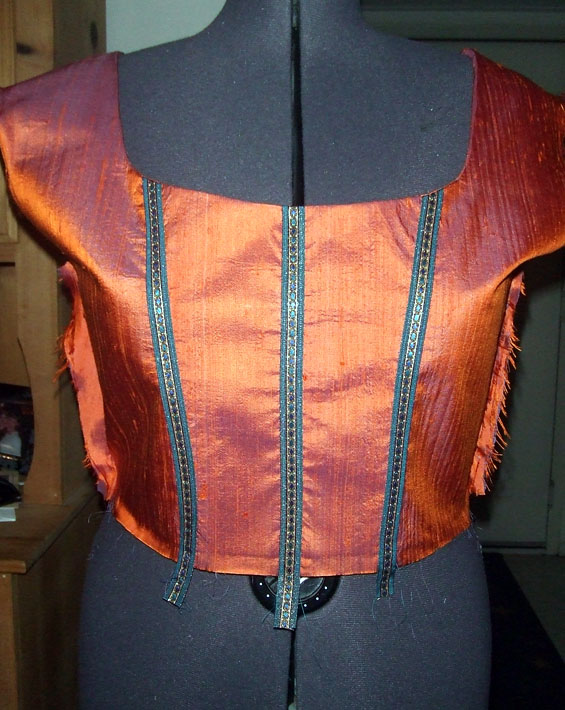
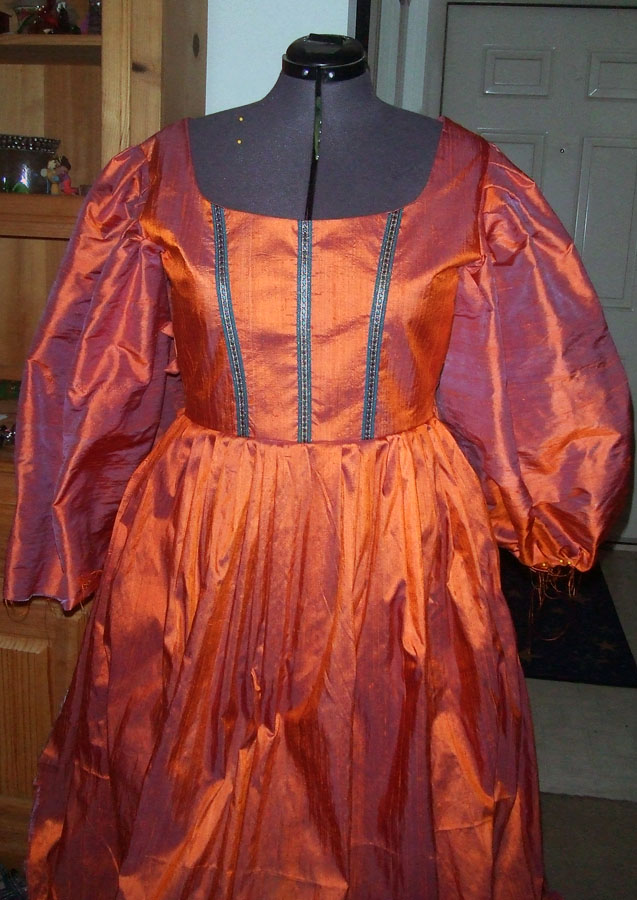
Once again, I'm feeling the need to experiment. I ended up losing my pattern from my first Italian Ren during the move. So I've had to start from scratch. So far its not too bad. I've been wanting to make an Italian Ren out of washable material. Both the lining and the outter fabric is cotton. The pearls are only on there because I was futzing around. I'm not completely sold on them yet. I still need to buy buttons or something to use for the side closures. Then the skirt will go on. For this one I'm hoping to make some detachable sleeves that actually WORK. I'm considering a contrasting color but I'm not sure if I want to go blue. I've been going a little crazy in the orange and blue department.

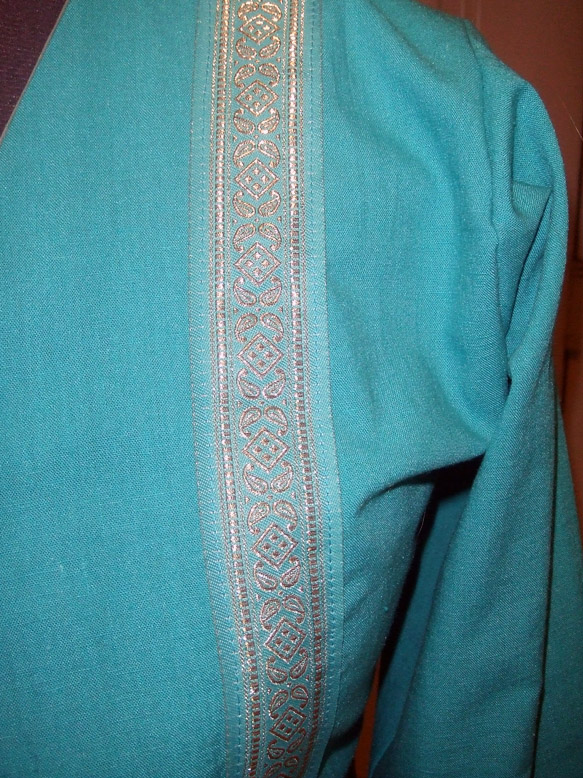
ALSO, I went fabric shopping with some gal pals un in the LA fashion district recently and picked up some shinies!

Fabric Goodness!
Okay, that first red fabric was from a few trips back. That will be turning into a doublet for the hubby. The teal silk is for me. I want to make another Italian Ren out of it but something a bit more ornate than I usually do. Currently reseaching that. The black was bought for a good friend who has been working hard helping us get the house in order. So he'll be getting a doublet as well.

And now that I'm more or less unpacked I finally found my period hat making book. So hopefully I can make a few coifs and perhaps a french hood. I've been really eager to try my hand at a french hood.

I'm really happy to get back to sewing again, I missed it! Hopefully I'll have some more pictures of new experiments as they come.

Thursday, July 16, 2009

SCA Tunics

Better Late than never, right?:)
Sorry I've been AWOL. My Husband and I are currently working on getting into our new home so things have been busy and my sewing has been on the non existent side since May. Hopefully this weekend I"ll post some detailed shots of a pair of steampunk wings I recently put together for Labyrinth Ball.
I made a punch of basic T-Tunics for some of our fellas (and one lady) in the household and I made a coat for my Hubby. Its not too much flash but they turned out pretty good. So I felt like sharing.:)


click the rest of these pics to enlarge.

All of the fabric is cotton and the colors were picked out by the gentlemen (and lady). The Red and blue tunic the gentleman in the third pic is wearing I did not make. But i did make the basic coat in the fourth picture. I was pretty happy with the turn out. I do plan to line that coat for him though since the fabric wasn't as warm as we suspected it would be.

And this is the coat I made for the hubby.
The photos unfortunately do not do the fabric justice. Its a beautiful silver and blue brocade. I used the same pattern as the fencing coat only removed the mods. So its the correct length and does not have the overflap for protection. I believe its an English style coat but I honestly can't remember. It definitely has signs of an early style cassock. We just call the style the fighting cassock since it works so well as fencing garb.
Unfortunately I ran out of time to put button holes in it so I had to quickly sew on the loops. These will be removed soon and I'll be putting in button holes instead. I will also be adding the collar back. Unfortunately time was a factor and I wanted him to have a coat for war.

The next item on my garb list will be another shot an Italian Ren for me. I'd like to make one that's more for war wear instead of court wear. Our household does a LOT of service and we get dirty frequently. ;)

Wednesday, April 22, 2009

Steampunk Coat

Started working on the coat!


So I had some time to rework my steampunk coat. I really have no deadline for this project so I've been taking my time. So far I like the little changes/embellishments I've made.
Here's a shot of the coat front.


I cinched in the side seams to make it more fitted. I also distressed the heck out of the fabric so it doesn't read so blocky. The studs I added makes it look less like a coat I sewed some crud on and more like an actual coat.
I debated on losing the cog buttons but I thought they were cute. Yeah there a little cheesy but I kinda like them.


This is my favorite detail so far. I wanted to add a bit of military-esque feel to the coat. Making the lapels asymetrical helped create a insignia on the coat...well that how I feel *L*


The back detail came out of nowhere. I wanted to make the collar stand up but I didn't want to take apart the collar and reconstruct it. So I used some nylon boning and backed the collar with that. I then painted the boning with various metalic acrylics to make them pop. The detail shot is at the top. I'm really happy with this choice.

That's about as far as I got. I'll be switching gears yet again and going back to garb since May Portero War is coming up and some friends as well as the hubby asked for some garb.
Expect more photos soon!:)

Saturday, April 18, 2009

Max's Fighting Coat

I just realized I never posted photos of my hubby in his finished coat!


Handsome devil, Ain't he? I also made him a matching hood as well.

I'll be using the un-tweaked pattern I used to his fighting coat to make him a nice piece for court garb this coming May War. Gotta keep the fella cleaned up, I tells ya!

Saturday, February 21, 2009

Steampunk Sketch

o as I've said, my next project will be my steampunk costume (and probably worked on the same time as garb since I'm kinda of a garb adict).
Anyways, I don't plan on making anything brand new but completely tweaking and revamping my costume from the 2007 Deadlands Halloween party. My character was Dr. Regina "Reggie" Black, mad scientist. It's a costume that has a lot of potential but I never got around to refining it.
Here's the rendering of the 2.0 version as well as a photo of the original costume.


For some more photos of the original costume and my plans, check under the cut.


The guns on the rendering are the ones I plan to pick up on ebay and modify into steampunk guns. I really have some interresting ideas for them that I can hopefully put on paper.


The changes are pretty small. I want to refine the coat, make it more fitted around the waist. I also want to do some destressing on it to give it texture and personality. The fabric is corderoy so it should texture nicely.I'll also be adding the gold braid to the buttons and pockets to make them pop.


I weill need to take in the vest since I've lost weight. I also am cosidering changing the clasps. I sculped them out of sculpty but I think I want something bigger and more metalic. I'm debating on the shirt. While I love the color, I think I might want something more feminine under the vest. The shirt is up for debate.


Unfortunately, those goggles have pretty much bit the dust. I love them but I made them quickly which ment they weren't ment to last long. I"m considering picking up some welding goggles to modify. I still want to keep the gadget-y look to them. The goggles were inspired by the goggles from the movie Sleepy Hollow. I think I'm going to try for a more delicate look as seen here.
http://4.bp.blogspot.com/_vheloFCFy9I/SIzo6EdVfEI/AAAAAAAAAI0/gPEyDO5CHqs/s320/goggles4.jpg
But not that exact style. I still plan to keep them on top of the head.

I'm also considering making pants in brown/tan instead of reusing the black ones. I think brown would lend better to the look of the costume. The boots I actually own. They are in black though. But honestly I think it will look fine since I'm going more for a wild west mish mash look as opposed to anything super refined.

I also plan to make a belt for a gun holster and another belt with some test tubes connected to it.

I think this is going to be a long term project. One I plan to work on periodically and come back to over a course of a few months.
And thats all for now, folks!

Saturday, February 7, 2009

Fighting Coat, Gawhzee, and Persian Coat.


My Husband Max's Rapier fighting coat and A few other things for Estrella War.:).


So We're gearing up for Estrella and I've been sewing a bunch. The big project was Max's fighting coat for Estrella. Its my first fighting coat not to mention my first male garb that wasn't a T-tunic. It turned out better than I expected.:)


It looks a bit wonky on the dress form since the form is for a woman and is much smaller than Max. It looks pretty darn good on him though. Hopefully pictures of him IN it will come after Estrella War.

With the left over fabric, I made myself a Gawzhee.


I reversed the fabric so it wouldn't be too matchy matchy with Max's coat.

Detail of the clasps:


It can get pretty chilly at Estrella so I dress in layers. Though sometimes my cloat gets in my way. So I put together a persian coat out of linen to wear when I'm not in the mood to put the cloak on.


THis is my first try with a persian. I had to play with the pattern to remove the darts in it...but unfortunately I made it a bit to small so this won't be closing. The sleeves are a little wonky but nothing horrible. I can probably fix it on my next go around with a persian coat.

Detail of trim:


I also cranked out quite a few pair of pants, and a tunic and a coat for a friend (unfortunately I didn't get pics of those yet)

I plan to take a short break from SCA garb for a bit and move on to working on my Steampunk costume next for a little variety.

Thanks for looking!

Sunday, January 11, 2009

Finished Italian Ren of the Orange


Myself and my beautiful friend Ty at Caid 12th Night.


I finished the sucker!
No, I'm not suddenly short armed. Those sleves are so voluminous that you can't see my elbows bent. I was hoping for that;)
Its ment to wear with or without a chamise. It was so dang hot yesterday night though that I opted for no Chamise. Not very period but MUCH more comfy while I sweated like a teamster.
The hem still needs to be taken up one more inch though. Its a bit long for my taste.
The dress involves 8 1/2 yards for orange silk. I was a large orange puff ball.
Here are some detail shots.


I bought this pin off a jewelry resaler and it was perfect to finish the dress off.


The side buttons I found at Joann Fabrics. Usually I don't have much luck finding good buttons there and I pick buttons up at SCA events. I Lucked out this time around.


My cuff on the sleeves...which you can't see under all that yardage. I think I may finish off the cuffs with a button to cover up the hook and eye I have there currently.

I'm extremely proud of this garb. Its perfect court garb for my SCA persona and it was very comfy. It will look more complete when I find a metal belt to go with it.
Next entry will probably be my husbands Raiper fighting coat and random persian coats for war....unless i get completely distracted by shiney things.

Wednesday, January 7, 2009

Orange Italian Ren IS GO!

No time like the present, right? That, and 12th Night is this coming Saturday.


Want to see the progress I made in one night?


I only work half days on Wednesdays so I dove on in after I got home. I just came to a finishing point a couple minutes ago. I desided to go more period and pleated the skirt and the Sleves instead of gathering them. Overall the look is far more elegant and finished.
I went with side closures again since I didn't have decent grommets and I also found some great buttons for slide closures.
I gotta admit, Silk shantung? Drapes BEAUTIFULLY! It pleats like a dream and gives plenty of volume.
The fit ain't half bad wither. The bodice pattern Is slowly getting better and better. Its still not perfect, but then neither is my body so it seems to all work out.;)
All I have left is:
Sew buttons on the sides
Close up the side seams on the skirt
put the cuffs on the sleeves
Hem the skirt
Hopefully finished product pictures come Friday night.